Automate your hiring process in 7 simple steps


Every hiring process starts with a job opening and ends with a successful hire. Somewhere along the way are repetitive tasks, manual hand offs, and delays that slow hiring down. Recruitment automation helps eliminate these bottlenecks and create a more efficient hiring process.
The biggest and often costliest mistake organizations make is automating the wrong process. Before building your first workflow, you need to identify what to automate, why it matters, and how to test it.
Why automate hiring?
Recruitment automation helps you:
- Reduce manual effort.
- Reduce hiring costs.
- Increase recruiter productivity.
- Reduce time-to-hire.
- Improve the candidate experience.
- Handle higher hiring volumes.
- Accelerate AI adoption with clear workflows.
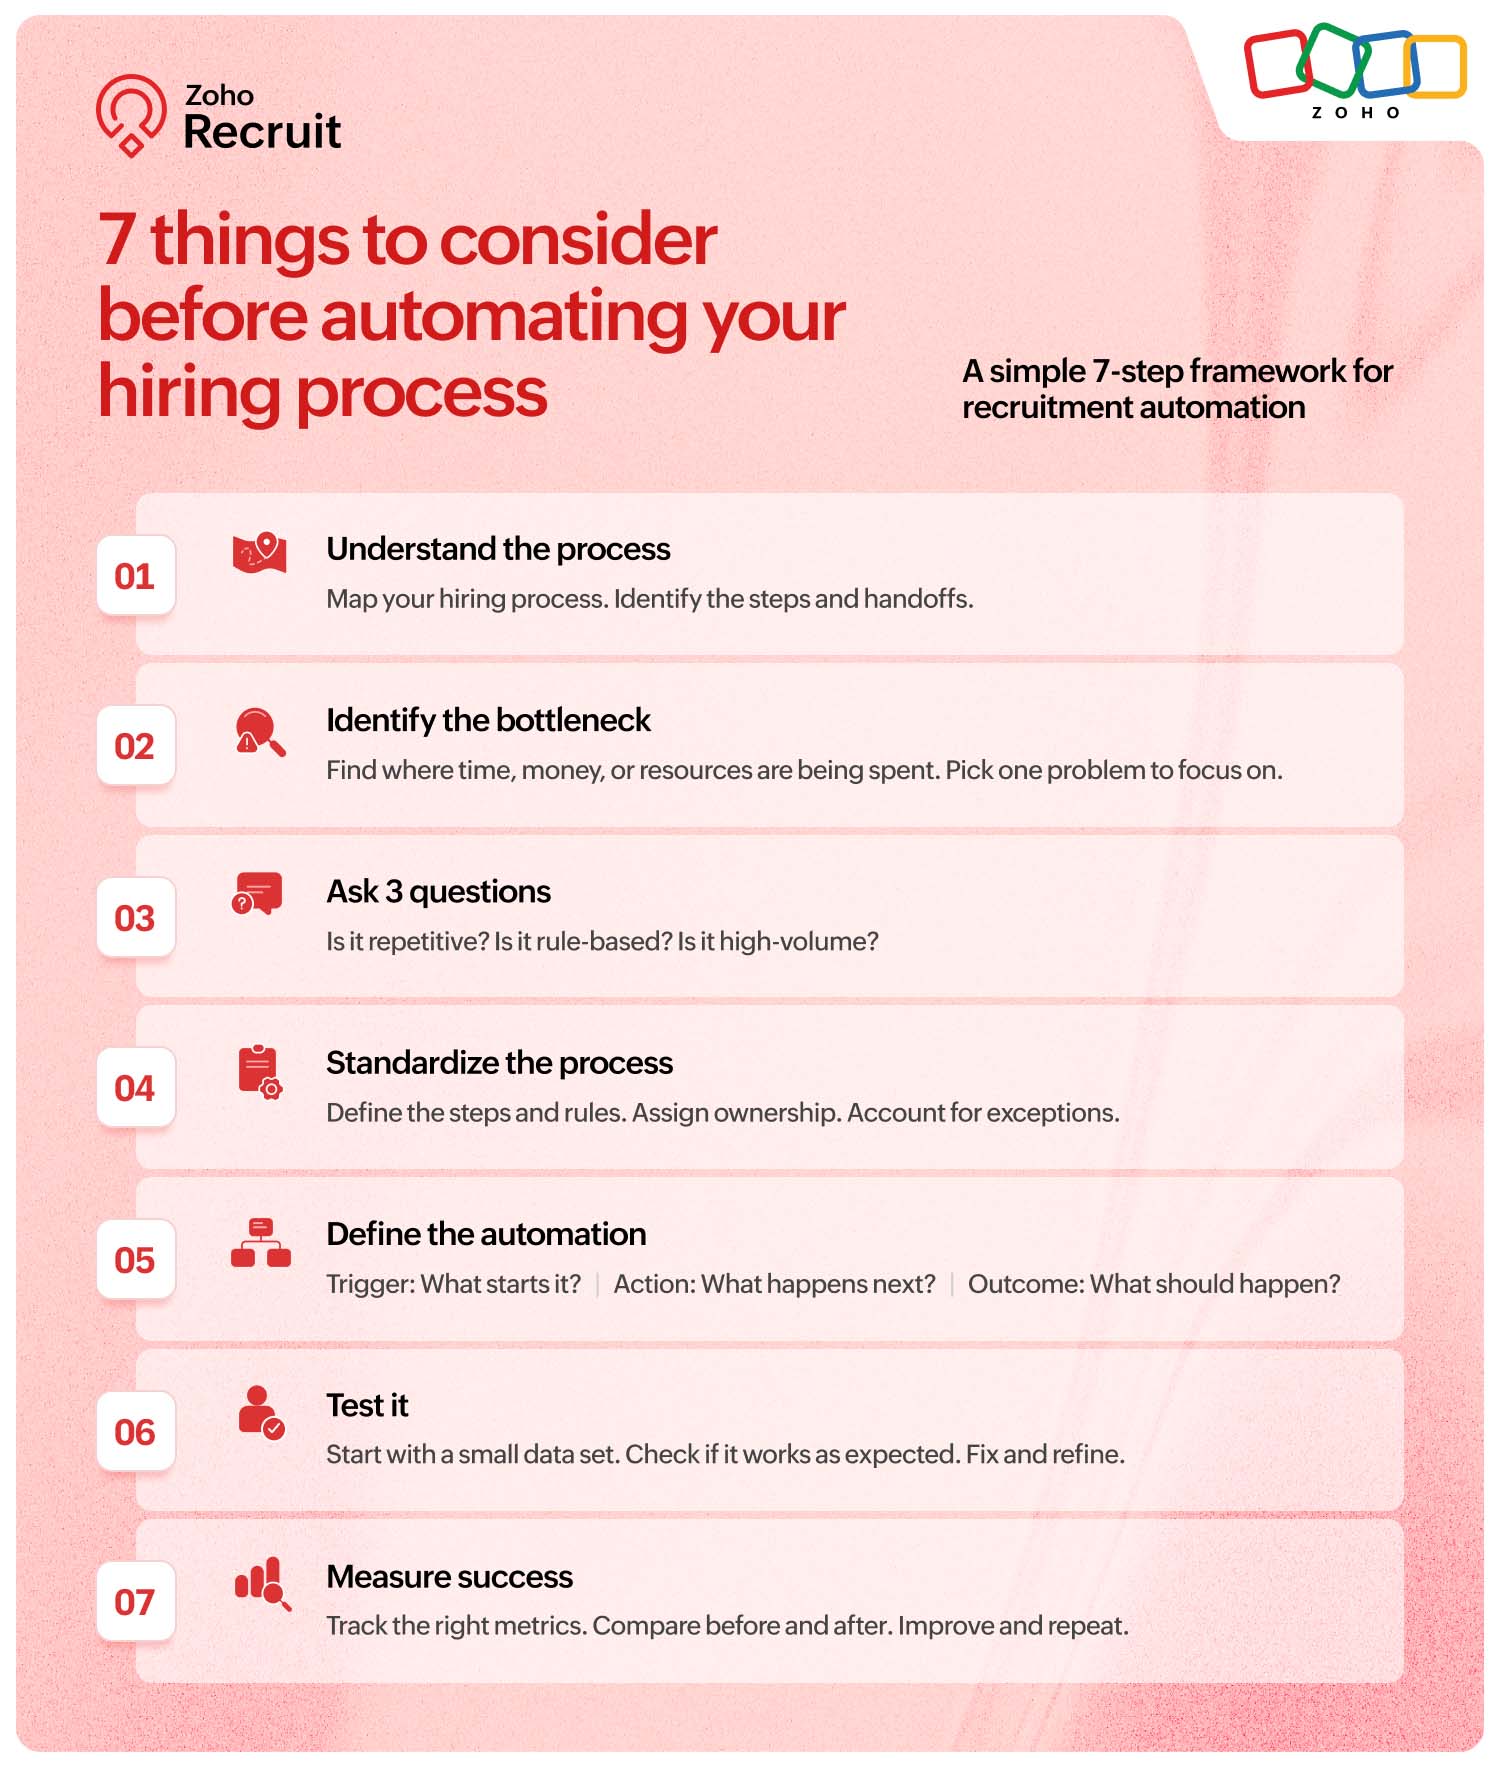
Here are seven practical steps to help you identify, build, and test recruitment workflows before rolling them out at scale.
Step 1: Map out your hiring process
Every organization has its own hiring process and unique bottlenecks. Start by mapping your hiring process as a simple skeleton, from the opening of a role to a successful hire.
This gives you a clear picture of every stage, the activities involved, and how candidates move through the process. As a result, you'll see where your effort and resources go so you can spot areas that may benefit from automation.
Step 2: Find and focus on one bottleneck
Now that you have a bird's-eye view, look at where your time, money, and resources are being spent.
Categorize the problem areas and tag them as either bottlenecks or cost centers:
Bottlenecks: Areas where candidates spend too much time waiting or moving through the process
Cost centers: Areas of the hiring process that consume significant recruiter time and resources
For example, if candidates are waiting too long for interview scheduling, tag it as a bottleneck. If recruiters spend hours manually scheduling those interviews, tag it as a cost center.
Step 3: Ask these three questions
Now that you've identified your bottlenecks and cost centers, it's time to choose one problem to automate. Before you pick one, ask these three questions:
- Is it repetitive and time-consuming?
- Is it rule-based? Can it be defined using clear if-then conditions?
- Is it high-volume?
A good example would be candidate follow-ups.
1) Is it repetitive and time-consuming? Yes. Recruiters regularly follow up with candidates at different stages.
2) Is it rule-based? Yes. If a candidate hasn't responded within three days, send a follow-up email.
3) Is it high-volume? Yes. The same follow-up may need to be sent to multiple candidates.
If you answer yes to all three, you've likely found a good fit for automation.
Step 4: Standardize the chosen process
You've shortlisted a bottleneck to automate. Before you automate it, make sure the process is clear, consistent, and follows predefined rules.
Start by creating an SOP for the chosen process:
- Document the process from start to finish.
- Define each step in the right sequence.
- Set clear rules and conditions.
- Assign ownership.
- Define exceptions and standardize communication.
For example, if candidate follow-ups are your chosen process, define when to send them, which template to use, who owns them, and what happens if the candidate responds or doesn't.
Remember: Remove unnecessary steps and variations before you automate.
Step 5: Define the trigger and outcome
Now that you've standardized the process, define how you want the automation to work. Use this simple framework to define your automation: Trigger → Action → Outcome.
- Trigger: What starts the automation?
- Action: What should happen when it's triggered?
- Outcome: What should happen next, and what if it doesn't go as planned?
For example, for candidate follow-ups:
Trigger: Candidate reaches the interview stage.
Action: Send a follow-up email after three days.
Outcome: If there's no response, send a reminder or notify the recruiter.
Think of it as telling your system when to act, what to do, and what should happen next.
Step 6: Test with a small data set
You've figured out what to automate and how to automate it. Now test it with a small data set or one specific use case.
For example, test the candidate follow-up workflow with one job opening and a small group of candidates. Check if it works as expected, fix any issues, and refine the workflow.
Start small. Test and refine before you scale.
Step 7: Measure success
Once the workflow works, scale it across more candidates and job openings. Then measure its impact.
For example, if your candidate follow-up automation was designed to reduce recruiter effort and improve response rates, compare the results before and after automation.
Use your KPIs to measure the impact. If the results aren't what you expected, revisit the workflow, make changes, and measure again.
Find one problem. → Standardize it. → Automate it. → Test it. → Measure it. → Improve it. → Move to the next problem.
Assess, automate, analyze
The roadmap to recruitment automation ends here. Now you know where to start and how to take an automation from idea to implementation. Start with the right problem, build a clear process, and test what works. Once you've got it right, move on to the next.
Happy automating!





Comments